Master bathroom tile cleaning with these professional hacks. Start by gathering essential tools: microfiber cloths, a sturdy brush, and eco-friendly solutions like vinegar and baking soda. Pre-clean by removing debris and decluttering surfaces. Apply a DIY cleaning paste of baking soda and water to tackle stubborn grout stains. For ceramic tiles, use a mixture of dish soap and hot vinegar. Implement a weekly deep-clean routine, focusing on grout lines and high-traffic areas. Maintain cleanliness with daily quick-cleans using a vinegar solution spray. Prevent future buildup by sealing grout every six months and using a squeegee after showers. These expert tips are just the beginning of your journey to spotless bathroom tiles.
Essential Tools and Supplies
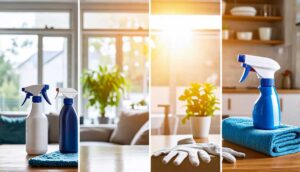
Equipping yourself with the right tools and supplies is essential for effective bathroom tile cleaning. A well-stocked cleaning arsenal should include basic equipment like microfiber cloths, scrub brushes, and a spray bottle, alongside specialized tile tools such as grout brushes and a squeegee. For eco-conscious cleaners, natural solutions like white vinegar and baking soda offer powerful yet environmentally friendly alternatives to harsh chemical cleaners.
Basic Cleaning Equipment
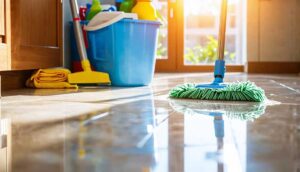
Assembling the right tools and supplies is vital for effective bathroom tile cleaning. A well-equipped cleaning arsenal should include a mop, scrub brush, microfiber cloths, baking soda, and white vinegar. These versatile items form the foundation of any thorough tile cleaning routine.
To guarantee a comprehensive cleaning process, consider incorporating these additional tools:
- Rubber gloves: Protect hands from harsh chemicals and prolonged water exposure
- Spray bottle: Efficiently apply cleaning solutions to targeted areas
- Squeegee: Prevent soap scum buildup and achieve streak-free surfaces
- Old toothbrush: Access hard-to-reach corners and grout lines
A sturdy scrub brush is essential for physically removing stubborn grime and buildup from tile surfaces and grout lines. Microfiber cloths are ideal for wiping and drying, effectively capturing dirt and leaving surfaces spotless. Baking soda and white vinegar serve as natural, cost-effective cleaning agents that effectively combat stains, dirt, and odors.
Regularly maintaining your cleaning tools is just as important. Properly clean and dry mops, brushes, and cloths after each use to prevent bacterial growth and guarantee peak performance. By investing in quality basic cleaning equipment and maintaining it properly, you’ll achieve professional-level results in your bathroom tile cleaning efforts.
Specialized Tile Tools
A well-stocked arsenal of specialized tile tools improves bathroom cleaning from a basic chore to a highly effective process. These tools, designed specifically for tile maintenance, guarantee thorough cleaning and preservation of both tiles and grout.
| Tool | Purpose | Benefits |
|---|---|---|
| Sturdy Brush | Scrub grout lines | Reaches crevices |
| Microfiber Cloth | Dry tiles | Prevents streaks |
| Squeegee | Remove excess water | Reduces soap scum |
| Spray Bottle | Apply cleaning solutions | Even coverage |
A sturdy brush or old toothbrush is necessary for tackling stubborn grime in grout lines and corners. Its bristles effectively dislodge dirt without damaging tile surfaces. Microfiber cloths are indispensable for drying tiles and preventing streaks, as they trap dirt and moisture efficiently.
A squeegee is important for post-shower maintenance, removing excess water to minimize soap scum buildup and moisture retention. This simple tool significantly reduces long-term cleaning efforts. A spray bottle facilitates even application of cleaning solutions, providing better coverage and effectiveness.
Rubber gloves, while not tile-specific, are essential for protecting hands from harsh chemicals and providing a better grip during scrubbing. These specialized tile tools and cleaning supplies improve the cleaning process, resulting in a more hygienic and visually appealing bathroom.
Eco-Friendly Cleaning Solutions

Environmentally conscious homeowners can create effective eco-friendly cleaning solutions using common household ingredients. These natural alternatives not only clean effectively but also promote a healthier indoor environment and reduce exposure to harsh chemicals. A versatile and biodegradable cleaner can be made by combining equal parts vinegar and water in a spray bottle, which effectively cuts through soap scum and neutralizes odors on tile surfaces.
For tougher stains, a paste made from baking soda and water serves as a gentle abrasive, allowing for thorough scrubbing without damaging tile surfaces. To improve the cleaning power and add pleasant scents, consider incorporating essential oils like tea tree or lavender, which also offer natural antibacterial properties.
Here are four key benefits of using eco-friendly cleaning solutions for bathroom tiles:
- Reduced environmental impact
- Lower risk of chemical exposure
- Cost-effective alternatives to commercial products
- Customizable cleaning power for various tile types
Regular maintenance using these eco-friendly solutions not only keeps bathroom tiles sparkling but also contributes to a more sustainable cleaning routine. By adopting these natural cleaning methods, homeowners can achieve professional-level results while minimizing their ecological footprint.
Pre-Cleaning Preparation Steps
Proper preparation is essential for efficient bathroom cleaning. Begin by gathering all necessary cleaning supplies, including solutions, brushes, mops, and microfiber cloths, to prevent interruptions during the process. Clear bathroom surfaces of personal items and decor, then make certain adequate ventilation by opening windows or activating exhaust fans to minimize fumes and promote faster drying times.
Gather Necessary Cleaning Supplies
Successful bathroom cleaning begins with assembling the right tools and supplies. To guarantee an efficient cleaning process, gather essential items such as rubber gloves, a spray bottle, white vinegar, dish soap, and baking soda. Prepare a powerful cleaning solution by mixing half a cup of dish soap with one cup of hot white vinegar. However, avoid using vinegar on natural stone tiles to prevent damage.
For effective tile cleaning, collect the following items:
- Old towels or rags to absorb runoff and prevent messes
- A sturdy brush or old toothbrush for scrubbing grout lines
- A cleaning caddy or designated space to organize supplies
- A spray bottle for applying the cleaning solution evenly
Organizing your cleaning supplies in a caddy or designated space promotes a more efficient cleaning routine by keeping everything easily accessible. This preparation step is essential for maintaining a thorough and detail-oriented approach to bathroom tile cleaning. By having all necessary cleaning supplies at hand, you can tackle stubborn stains, grime, and bacteria buildup more effectively, guaranteeing your bathroom tiles remain sparkling and hygienic. Remember to use appropriate protective gear, such as rubber gloves, to safeguard your hands during the cleaning process.
Clear Bathroom Surfaces
Preparation is key to achieving a spotless bathroom. To effectively clear bathroom surfaces, begin by removing all items from countertops, shelves, and fixtures. This vital step creates an unobstructed workspace, allowing for thorough cleaning of all areas.
Next, declutter and organize your bathroom items. Discard expired products and arrange remaining items by frequency of use. This streamlines the cleaning process and makes future maintenance easier. Verify all surfaces are completely dry before proceeding, as moisture can dilute cleaning solutions and reduce their effectiveness.
Gather all necessary cleaning supplies and tools in one location to minimize interruptions during the cleaning routine. This promotes efficiency and helps maintain focus on the task at hand. Before tackling lower areas, dust high surfaces such as shelves and light fixtures. This prevents redistributing dirt onto already cleaned surfaces, saving time and effort.
Ventilate the Space
Bathroom ventilation plays an essential role in the pre-cleaning preparation process. Proper airflow reduces humidity levels, which helps prevent mold and mildew growth on bathroom tiles and grout. Opening windows and using exhaust fans during cleaning significantly decreases the concentration of cleaning fumes and improves air circulation. This not only creates a safer environment for the cleaner but also boosts the effectiveness of cleaning agents by allowing them to work without interference from excess moisture in the air.
To maximize the benefits of ventilation during bathroom cleaning:
- Open all windows and doors to create cross-ventilation
- Turn on exhaust fans at least 15 minutes before starting to clean
- Use portable fans to direct air flow towards open windows or doors
- Keep ventilation running for 30 minutes after cleaning is complete
Adequate ventilation allows surfaces to dry quickly, minimizing moisture retention that can lead to bacterial growth and unpleasant odors. By maintaining a well-ventilated bathroom, you promote a healthier environment by reducing allergens and improving overall air quality. This pre-cleaning step not only facilitates the cleaning process but also contributes to long-term tile and grout maintenance, ensuring a cleaner, fresher bathroom.
Effective Tile Cleaning Techniques
Effective tile cleaning techniques encompass a range of strategies, from pre-cleaning preparation to deep cleaning methods and ongoing maintenance. A thorough approach involves removing loose debris, applying appropriate cleaning solutions, and addressing stubborn stains and grout discoloration. Implementing preventative measures and regular upkeep routines guarantees long-lasting cleanliness and hygiene in bathroom tile surfaces.
Pre-Cleaning Preparation Steps
Before diving into the tile cleaning process, proper preparation is vital for achieving ideal results. To guarantee an efficient and thorough cleaning session, gather all necessary supplies, including rubber gloves, a spray bottle for cleaning solutions, and a sturdy scrub brush. Clear the bathroom of all items such as toiletries, towels, and rugs to provide unobstructed access to tile surfaces and prevent debris from interfering with cleaning.
Begin the pre-cleaning preparation steps by addressing the following key points:
- Dust or sweep tile floors to remove loose dirt and debris
- Select an appropriate cleaning solution based on the tile type
- Guarantee proper ventilation by opening windows or using exhaust fans
- Organize cleaning tools and solutions for easy access during the process
Proper ventilation is vital during the cleaning process to reduce fumes and improve drying times for the tiles. When selecting a cleaning solution, consider the tile material, as acidic solutions can damage stone tiles, while ceramic and porcelain benefit from vinegar-based cleaners. By meticulously following these pre-cleaning preparation steps, you set the stage for a more effective and efficient tile cleaning experience.
Deep Cleaning Tile Surfaces
With the preparatory steps complete, it’s time to focus on deep cleaning tile surfaces. Create a powerful cleaning paste by mixing three parts baking soda with one part water. Apply this mixture to grout lines and scrub vigorously with a firm toothbrush to eliminate stubborn stains and odors. For an alternative approach, utilize a steam cleaner to loosen caked-on dirt effectively, making removal easier without harsh chemicals.
When dealing with ceramic and porcelain tiles, prepare a DIY solution combining half a cup of dish soap with one cup of hot white vinegar. Spray this mixture onto the tiles, allow it to sit for 10 minutes, then scrub and rinse thoroughly. To maintain the cleanliness and longevity of your tile surfaces, implement a weekly cleaning routine. This should include wiping down surfaces with a squeegee after showers to prevent soap scum and moisture accumulation.
Remember to seal grout every six months to protect against moisture and bacteria buildup. This practice not only prolongs the life of your tile surfaces but also maintains their appearance, ensuring a hygienic and visually appealing bathroom environment.
Tackling Grout and Stains
In the domain of tackling grout and stains, a strategic approach is essential for achieving pristine tile surfaces. Effective grout cleaning begins with a powerful cleaning agent: a paste made from three parts baking soda and one part water. Apply this mixture to grout lines and scrub with an old toothbrush to lift stubborn dirt and discoloration.
For persistent stains on tiles, combine equal parts vinegar and baking soda to create a foaming cleaner that effectively removes grime and restores shine. Hard water deposits and soap scum can be addressed through regular maintenance and targeted cleaning techniques.
To guarantee long-lasting cleanliness and prevent future staining, follow these key steps:
- Seal grout lines every six months to prevent moisture penetration
- Implement a weekly cleaning routine focusing on grout and tile surfaces
- Use a steam cleaner for deep penetration and bacteria removal
- Address stains immediately to prevent set-in discoloration
Maintenance and Prevention Strategies
Maintaining pristine bathroom tiles requires a proactive approach and consistent implementation of effective cleaning techniques. Regular cleaning, performed once a week, is essential to prevent the accumulation of soap scum and grime, reducing the need for intensive cleaning sessions. A vinegar and water solution, used for daily rinsing, helps minimize hard water stains and soap scum buildup on tiles and shower surfaces.
For stubborn grout stains, create a baking soda paste for effective scrubbing. This natural abrasive lifts dirt without damaging tile surfaces. After each shower, use a squeegee to remove excess moisture, significantly reducing the risk of mold and mildew growth on tiles and grout.
Sealing grout lines every six months and regularly maintaining stone tiles with appropriate sealers improves moisture resistance and prolongs the lifespan of tiled surfaces. This preventive measure is vital for maintaining the integrity of your bathroom tiles. By incorporating these maintenance and prevention strategies into your cleaning routine, you can guarantee your bathroom tiles remain in ideal condition, reducing the need for extensive cleaning efforts in the long run.
Tackling Stubborn Stains and Grout
Stubborn stains and grout discoloration often require specialized cleaning approaches. A vinegar-baking soda solution can effectively break down tough grime and deodorize grout lines, while steam cleaning methods provide a chemical-free alternative for lifting embedded dirt. For particularly resistant stains, specialized grout cleaners may be necessary to restore the pristine appearance of tiled surfaces.
Vinegar-Baking Soda Solution
A powerful DIY cleaning solution for tackling stubborn bathroom stains and discolored grout combines equal parts vinegar and baking soda. This natural mixture creates a chemical reaction that effectively lifts dirt, grime, and mildew from tile surfaces and grout lines. To use this solution:
- Mix equal parts vinegar and baking soda to form a paste
- Apply the paste directly to stained areas and grout lines
- Allow the mixture to sit for 10-15 minutes
- Scrub thoroughly with a brush before rinsing
This method is safe for most tile surfaces but should be avoided on sensitive materials like marble and certain stones to prevent damage. The vinegar-baking soda solution is particularly effective at breaking down soap scum, hard water deposits, and mold growth commonly found in bathrooms. Regular use of this cleaning technique can help maintain clean and fresh bathroom tiles, reducing the need for harsh chemical cleaners. By incorporating this natural solution into your cleaning routine, you can effectively combat stubborn stains and discoloration while promoting a healthier, more hygienic bathroom environment. Remember to test the solution on a small, inconspicuous area before widespread application to ascertain compatibility with your specific tile and grout materials.
Steam Cleaning Methods
Periodically employing steam cleaning methods can transform your approach to tackling stubborn stains and grout in the bathroom. Steam cleaners harness the power of high-temperature vapor (around 200°F) to penetrate porous surfaces, effectively loosening and lifting dirt, soap scum, and mineral deposits. This process not only dissolves tough grime but also eliminates up to 99.9% of bacteria and germs without relying on harsh chemicals.
The concentrated steam is particularly effective in addressing grout lines and corners, areas prone to dirt and bacteria accumulation. By focusing the steam on these troublesome spots, you can achieve a deep clean that surpasses traditional methods. Regular steam cleaning, performed every few months, helps maintain tile appearance and prevents the buildup of mold, mildew, and hard water stains.
One of the most significant advantages of steam cleaning is its ability to reduce scrubbing efforts. The heat and moisture work synergistically to lift stubborn stains, saving time and energy during the cleaning process. By incorporating steam cleaning into your bathroom maintenance routine, you can achieve professional-level results while minimizing the need for intensive manual labor.
Specialized Grout Cleaners
Designed to tackle the toughest bathroom grime, specialized grout cleaners offer a powerful solution for revitalizing tile surfaces. These cleaners contain potent enzymes and surfactants formulated to penetrate porous grout lines, effectively breaking down stubborn stains and mildew. Safe for various tile types, they remove dirt without damaging surrounding surfaces, making them an essential tool for maintaining pristine bathroom tiles.
To maximize the effectiveness of specialized grout cleaners, follow these cleaning tips:
- Adhere to manufacturer’s instructions for application time and dilution ratios
- Pre-clean the surface to remove loose debris before applying the grout cleaner
- Use a brush to agitate the cleaner, ensuring it penetrates deep into grout lines
- Rinse thoroughly and allow the surface to dry completely before sealing
Regular use of these cleaners prevents discoloration and buildup, prolonging the need for resealing. For best results, apply a grout sealer after cleaning to protect against future stains and moisture penetration. This additional step improves the longevity of your cleaning efforts and simplifies ongoing maintenance, ensuring your bathroom tiles remain in prime condition for years to come.
Maintenance for Long-Lasting Cleanliness
Maintaining a pristine bathroom requires a combination of daily quick-clean routines and weekly deep-cleaning schedules. Implementing a consistent daily regimen, such as wiping down surfaces and using a squeegee after showers, prevents the accumulation of soap scum and water spots. Complementing this with a thorough weekly cleaning session and incorporating preventive measures like regular grout sealing guarantees long-lasting cleanliness and reduces the need for intensive scrubbing sessions.
Daily Quick-Clean Routine
A well-structured daily quick-clean routine is essential for maintaining long-lasting cleanliness in your bathroom. Implementing simple yet effective habits can significantly reduce the need for intensive cleaning sessions and preserve the pristine condition of your tiles and fixtures.
To establish an efficient daily quick-clean routine:
- Spray a 50/50 vinegar and water solution on shower walls and tiles after use, then quickly rinse to prevent soap scum and mineral deposit buildup.
- Immediately spot dry wet areas with a towel or squeegee to minimize moisture retention, reducing the risk of mold and mildew growth.
- Wipe down high-touch surfaces like faucet handles and countertops with disinfecting wipes to maintain hygiene and prevent germ spread.
- Pour a mixture of baking soda and vinegar down drains daily to prevent clogs and eliminate odors.
Consistently following these steps will help maintain a clean and fresh bathroom environment. Additionally, regularly check and restock cleaning supplies, ensuring you have the necessary tools for quick clean-ups and maintenance. By incorporating these habits into your daily routine, you’ll minimize the accumulation of dirt and bacteria, keeping your bathroom tiles and surfaces in top condition.
Weekly Deep-Clean Schedule
Every successful bathroom maintenance plan includes a robust weekly deep-clean schedule. Establishing a consistent weekly cleaning routine is essential for managing soap scum and grime buildup on bathroom tiles, ensuring a hygienic environment. To deep clean your bathroom effectively, start by focusing on the grout lines, which are prone to dirt accumulation and mold growth. Scrub the grout thoroughly using a specialized brush or an old toothbrush to remove stubborn stains.
For best results, utilize a DIY cleaning solution consisting of half a cup of dish soap and one cup of hot vinegar. This powerful mixture breaks down tough residues on tiles and surfaces. Apply the solution generously, allowing it to sit for a few minutes before scrubbing. Rinse thoroughly with clean water to reveal sparkling tiles.
Incorporate bathroom cleaning hacks like using a squeegee after each shower to minimize moisture and extend the cleanliness between weekly cleanings. Additionally, schedule monthly deep cleans to address any persistent stains or buildup that may have formed over time. By adhering to this comprehensive weekly deep-clean schedule, you’ll maintain a pristine bathroom and prevent long-term damage to your tiles and grout.
Preventive Measures Implementation
Numerous preventive measures can be implemented to maintain long-lasting cleanliness in your bathroom. Establishing a weekly cleaning schedule is essential to prevent the buildup of soap scum and grime, reducing the need for intensive deep cleaning sessions. Daily maintenance, such as using a vinegar and water rinse, can effectively deter soap scum accumulation and keep tiles looking fresh.
To further protect your bathroom tiles and grout, consider the following preventive measures:
- Squeegee shower tiles after each use to minimize moisture and prevent mold and mildew growth
- Seal grout lines every six months to protect against moisture penetration and staining
- Spot clean spills and stains immediately to prevent them from setting
- Implement a daily quick-clean routine to maintain overall cleanliness
These preventive measures, when combined with regular cleaning, will help maintain a consistently clean bathroom. By addressing potential issues before they become significant problems, you can extend the life of your tiles and grout while minimizing the time and effort required for deep cleaning sessions. Consistency in implementing these preventive measures is key to achieving and maintaining a sparkling, hygienic bathroom environment.
Frequently Asked Questions
How Do You Clean Bathroom Tiles Like a Pro?
Picture gleaming tiles reflecting pristine cleanliness—this is the goal of professional bathroom tile cleaning. Begin by sweeping or vacuuming to remove loose debris. Create a potent cleaning solution using dish soap and white vinegar. For stubborn stains, apply a baking soda paste. Scrub grout lines with a firm brush. Utilize a squeegee post-shower to prevent moisture buildup. Implement weekly maintenance and monthly deep cleans. Always rinse thoroughly to eliminate residue. Seal grout regularly to maintain hygiene and appearance.
What Is the Best Hack for Cleaning Bathroom Tiles?
The most effective hack for cleaning bathroom tiles is using a DIY solution of equal parts vinegar and baking soda. This mixture creates a foaming reaction that efficiently lifts dirt and stains from both tiles and grout. Apply the solution, allow it to sit briefly, then scrub with a brush. For stubborn stains, create a paste with baking soda and water, apply directly, and scrub with a toothbrush. Regular use of this method guarantees sparkling, hygienic tiles while minimizing bacterial buildup.
What Is the Best Solution for Cleaning Bathroom Tiles?
Time to shine a light on the best solution for cleaning bathroom tiles! A mixture of 50% dish soap and 50% warm water proves to be the most effective and versatile option. This combination efficiently removes dirt and grime without damaging surfaces. For ceramic and porcelain tiles, a 50/50 vinegar-water solution excels at breaking down soap scum and mineral deposits. However, for natural stone tiles, opt for a gentle soap diluted with water to maintain their integrity.
What Do Professionals Use to Clean Tiles?
Professionals employ a variety of specialized products and techniques to clean tiles effectively. They often utilize commercial-grade all-purpose cleaners with disinfecting properties, as well as specialized tile and grout cleaners containing oxygen bleach or enzymes. A mixture of vinegar and baking soda is frequently used for stubborn stains. Steam cleaners are favored for their ability to sanitize without chemicals. High-quality microfiber cloths and scrub brushes are essential tools, ensuring thorough cleaning without damaging tile surfaces.