The best way to deep clean vinyl floors for a spotless finish involves thorough preparation, appropriate cleaning solutions, and effective mopping techniques. Start by clearing the area and removing loose debris. Use a pH-neutral cleaner or diluted dish soap for safe cleaning, avoiding harsh chemicals. Employ a microfiber mop in a figure-eight pattern, working in small sections. Tackle stubborn stains with targeted treatments and rinse the floor with clean water to remove residue. Dry the surface with a clean cloth and buff for extra shine. Regular maintenance and prompt attention to spills are key to preserving your vinyl floor’s appearance. Discover more tips to keep your floors immaculate.
Preparation and Initial Cleaning
Before deep cleaning vinyl floors, it’s essential to clear the area of all furniture and loose items. This step guarantees unobstructed access to the entire floor surface, allowing for a thorough cleaning process. Once the space is cleared, sweep or vacuum the floor meticulously to remove loose dirt, dust, and debris, which prevents potential scratching during the subsequent deep cleaning stages.
Clear the Area
The first vital step in deep cleaning vinyl floors involves clearing the area completely. Remove all furniture and items from the room to guarantee unobstructed access and prevent potential damage during the cleaning process. This thorough preparation allows for a more efficient and effective deep clean.
Once the area is clear, begin by sweeping or vacuuming the floor to eliminate loose dirt, dust, and debris. Use a vacuum with bare floor settings, confirming the beater bar is turned off to avoid damaging the vinyl surface. This initial cleaning step is essential as it prevents scratches during the subsequent mopping process.
| Benefits of Clearing the Area | Potential Risks if Skipped | Impact on Cleaning Quality |
|---|---|---|
| Unobstructed access | Missed spots | Thorough cleaning |
| Prevents furniture damage | Furniture stains | Even results |
| Easier maneuverability | Inefficient cleaning | Time-saving |
| Reveals hidden dirt | Overlooked problem areas | Spotless finish |
| Allows for complete drying | Moisture damage to items | Long-lasting cleanliness |
After clearing the area and performing initial cleaning, inspect the floor for any stubborn stains or sticky areas that may require special attention. This thorough preparation sets the stage for an effective deep cleaning process, guaranteeing a spotless finish for your vinyl floors.
Sweep and Vacuum
Effective floor preparation begins with thorough sweeping and vacuuming, essential steps in the deep cleaning process for vinyl floors. Start by removing all furniture and obstacles to guarantee complete access to the entire floor surface. This allows for maximum coverage and prevents dirt from being overlooked in hard-to-reach areas.
Use a broom or vacuum with a hard floor setting to remove loose dirt, crumbs, and debris. For ideal results, consider using a microfiber dust broom, which excels at capturing fine particles like dust and hair. This initial cleaning step is vital for preventing scratches and maintaining the overall appearance of your vinyl flooring.
Regular maintenance is key to keeping your vinyl floors in prime condition. Aim to vacuum at least once a week, especially in high-traffic areas or homes with pets and children. This frequency helps prevent dirt accumulation and reduces the need for more intensive cleaning sessions. By incorporating sweeping and vacuuming into your regular cleaning routine, you’ll not only extend the life of your vinyl floors but also simplify future deep cleaning efforts, guaranteeing a consistently clean and appealing surface.
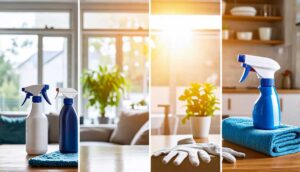
Choosing the Right Cleaning Solution
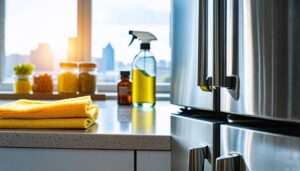
Selecting an appropriate cleaning solution is essential for effectively deep cleaning vinyl floors without causing damage. Mild detergents, such as pH-neutral cleaners specifically formulated for vinyl, offer safe and effective options for routine maintenance. For a cost-effective alternative, a homemade mixture of white vinegar, hot water, and a small amount of dish soap can effectively cut through dirt and grime while avoiding harsh chemicals that may compromise the floor’s integrity.
Mild Detergent Options
Choosing the right cleaning solution is vital for maintaining the beauty and integrity of vinyl floors. Mild detergents are the most effective and safest options for deep cleaning vinyl surfaces without causing damage or leaving residue. A simple mixture of warm water and a pH-neutral cleaner or diluted dish soap creates an ideal cleaning solution for routine maintenance and deep cleaning sessions.
When using dish soap, add only 1-2 drops to a bucket of warm water to improve cleaning power while maintaining a gentle formula. This combination effectively removes dirt and grime without compromising the vinyl’s protective layer. For those seeking a natural alternative, a mixture of white vinegar and water (1 cup of vinegar to 1 gallon of water) serves as a mild disinfectant while being safe for vinyl flooring.
It’s important to avoid harsh chemicals, particularly ammonia-based products, as they can degrade the vinyl and lead to discoloration over time. Regular use of mild detergents helps prevent buildup of dirt and grime, contributing to the longevity and appearance of vinyl floors. By selecting the appropriate cleaning solution, you guarantee a thorough clean while preserving the floor’s quality and shine.
DIY Cleaning Mixtures
DIY cleaning mixtures offer a cost-effective and environmentally friendly approach to maintaining vinyl floors. A highly effective solution consists of 1 cup of white vinegar, 1 gallon of hot water, and 1-2 drops of Dawn dish soap. This combination provides excellent grease-cutting power without harsh chemicals, making it ideal for cleaning vinyl flooring. For stubborn stains, create a baking soda paste by mixing it with water, applying it to the affected area, and gently scrubbing.
Natural alternatives include using citrus essential oil instead of dish soap in the vinegar and water mixture, adding a pleasant scent while maintaining cleaning effectiveness. When preparing and using DIY cleaning mixtures, keep in mind:
- Avoid ammonia-based products and abrasive cleaners
- Regularly check and refresh solutions to maintain effectiveness
- Use non-abrasive pads for scrubbing to prevent surface damage
- Rinse thoroughly with clean water after cleaning
- Test new mixtures on a small, inconspicuous area first
These homemade solutions are not only economical but also allow for customization based on specific cleaning needs. By using readily available ingredients like white vinegar, baking soda, and dish soap, you can effectively clean vinyl plank flooring without compromising its integrity or appearance.
Avoid Harsh Chemicals
In terms of deep cleaning vinyl floors, one must carefully consider the cleaning solutions used to protect the flooring’s integrity and appearance. Avoiding harsh chemicals is vital for maintaining the quality and longevity of vinyl flooring. Instead, opt for non-toxic cleaning solutions that are both effective and safe for the material.
A popular and eco-friendly choice is a mixture of vinegar and water, using 1 cup of vinegar per gallon of hot water. This solution effectively cleans without damaging the vinyl surface. For improved grease-cutting power, add a few drops of Dawn dish soap to the vinegar solution. When selecting commercial cleaning products, choose pH-neutral floor cleaners specifically formulated for vinyl flooring.
| Recommended | Avoid |
|---|---|
| Vinegar & Water | Ammonia-based cleaners |
| pH-neutral cleaners | Abrasive cleaners |
| Non-toxic solutions | Harsh chemicals |
It’s essential to steer clear of ammonia-based or abrasive cleaners, as these can damage the surface and degrade the vinyl over time. By consistently using gentle, non-toxic cleaning solutions, you not only protect your vinyl flooring but also contribute to a healthier indoor environment free from synthetic chemicals.
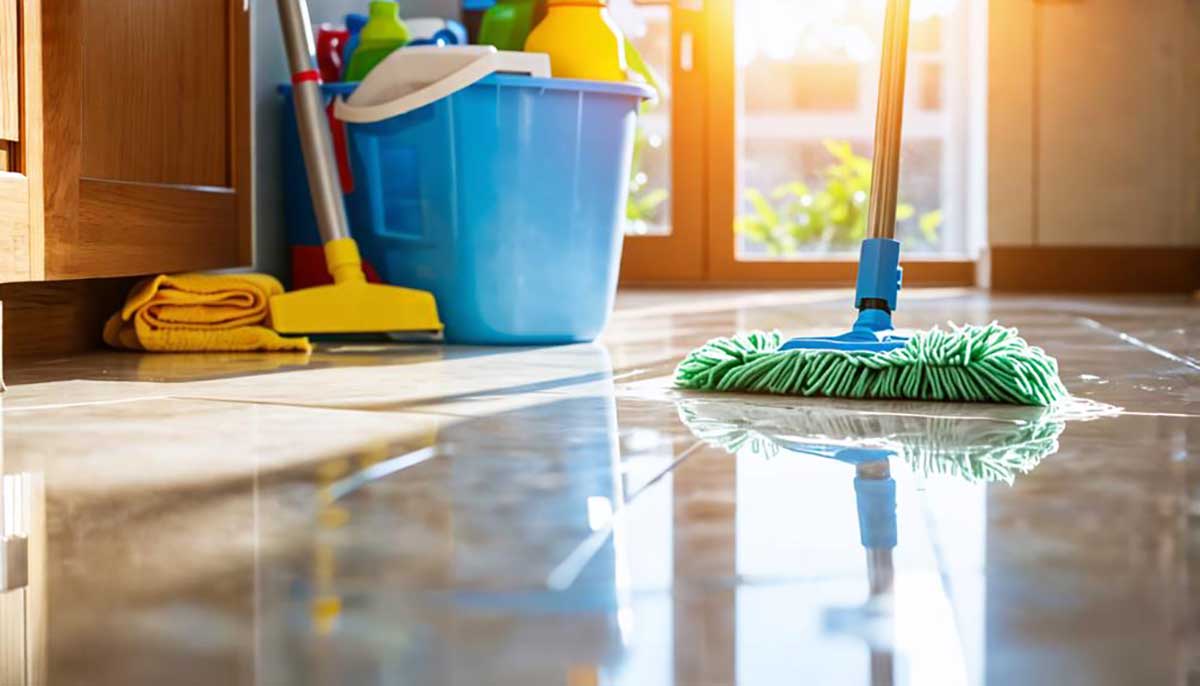
Mopping Techniques for Vinyl Floors
Selecting the appropriate mop is vital for effectively cleaning vinyl floors, with microfiber mops being the preferred choice due to their gentle yet thorough cleaning action. When mopping, work in small sections and follow the grain of the vinyl planks to guarantee even cleaning and prevent streaking. Frequent rinsing of the mop in clean water is essential to avoid spreading dirt and leaving behind a sticky residue on the floor surface.
Proper Mop Selection
In relation to deep cleaning vinyl floors, selecting the right mop is vital for achieving best results. A microfiber mop is the ideal choice for vinyl surfaces, as its soft fibers effectively capture dirt without causing scratches. This type of mop is essential to the cleaning process, guaranteeing thorough dirt removal while protecting the floor’s integrity.
When choosing a mop for vinyl floors, consider the following:
- Opt for a mop with easily washable and replaceable pads
- Avoid mops with coarse scrubbing pads or steel wool
- Select a mop that allows for efficient wringing to control excess water
- Choose a lightweight mop for ease of use during extended cleaning sessions
- Look for mops with adjustable handles for comfortable use
The right mop should facilitate proper cleaning technique, allowing you to work in small sections and follow the grain of vinyl planks. This approach guarantees a thorough clean without leaving streaks or residue. Remember to wring out the mop well before use to prevent excess water on the floor, which can lead to warping or damage. By selecting an appropriate mop and employing correct techniques, you can effectively deep clean your vinyl floors for a spotless finish.
Effective Mopping Patterns
In terms of effective mopping patterns for vinyl floors, technique plays an essential role in achieving a spotless finish. When mopping, adopt a figure-eight pattern to guarantee complete coverage and avoid missing any spots on the surface. This method allows for efficient cleaning while maintaining control over the mop.
To prevent streaking and guarantee thorough cleaning, mop in small sections of approximately 3 feet at a time. This approach prevents the cleaning solution from drying too quickly, which can leave unsightly marks on the floor. Always follow the grain of the planks while mopping to maintain the floor’s appearance and reduce the risk of scratching the surface.
Rinse the mop frequently in a separate bucket of clean water to remove accumulated dirt and prevent redistributing grime back onto the floor. After completing the mopping process, use a clean, dry microfiber cloth to buff the floor. This final step improves shine and guarantees no moisture remains, which could potentially warp the vinyl. By following these effective mopping patterns and techniques, you’ll achieve a spotless finish that preserves the beauty and longevity of your vinyl floors.
Tackling Stubborn Stains
Effectively tackling stubborn stains on vinyl floors requires a strategic approach, beginning with pre-treating the affected areas. Different types of stains necessitate specific removal techniques, such as using baking soda paste for food-related marks or rubbing alcohol for ink and cosmetics. Implementing proper cleaning habits and addressing spills promptly can significantly reduce the occurrence of difficult-to-remove stains in the future.
Pre-Treating Tough Stains
Tackling stubborn stains on vinyl floors requires a targeted approach before proceeding with the general deep cleaning process. For tough stains like ink or food, create a baking soda paste by mixing equal parts baking soda and water. Apply this paste directly to the stain and gently rub with a soft cloth until the stain lifts.
Diluted dish soap can effectively remove sticky residues. Apply the solution to the affected area, allow it to sit briefly, then wipe with a damp cloth to protect the vinyl finish. For cosmetics or ink stains, use rubbing alcohol applied to a soft-bristle brush, carefully scrubbing the area without damaging the surface.
When dealing with dried glue or adhesive, use a specialized adhesive remover like Bostik’s Ultimate Adhesive Remover, following the product instructions carefully. After treating any stains, always rinse the area with clean water to remove cleaning residue and pat dry with a clean towel.
- Create a baking soda paste for tough stains
- Use diluted dish soap for sticky residues
- Apply rubbing alcohol for cosmetics or ink stains
- Utilize specialized adhesive removers for dried glue
- Rinse treated areas with clean water and pat dry
Stain-Specific Removal Techniques
Removing stubborn stains from vinyl floors requires specific techniques tailored to each type of stain. For food-related stains like ketchup or grape juice, create a paste by mixing baking soda with water and gently rub it onto the affected area until the stain lifts. To remove stains from vinyl caused by ink, apply rubbing alcohol to a soft-bristle brush and carefully scrub the spot, followed by wiping with a damp cloth to eliminate residue.
When cleaning vinyl plank flooring, sticky substances such as gum require a different approach. Use a putty knife to carefully scrape off the material, taking care not to damage the underlying surface. For dried glue, a commercial adhesive remover like Bostik’s Ultimate Adhesive Remover can be highly effective. Always follow up with standard cleaning procedures to maintain the floor’s appearance.
Stain-specific removal techniques are most successful when applied promptly. Addressing spills and marks as soon as they occur is vital, as allowing them to set can lead to permanent discoloration and make removal more challenging. By utilizing these targeted methods, you can effectively tackle a wide range of stubborn stains on your vinyl flooring.
Preventing Future Stains
While addressing existing stains is essential, implementing preventive measures can safeguard your vinyl floors from future stubborn marks. Regular maintenance using a microfiber mop with a mild cleaning solution helps prevent grime buildup and reduces the likelihood of tough stains forming over time. Placing doormats at entrances and enforcing a no-shoe policy significantly minimizes dirt and potential stains from being tracked onto vinyl flooring.
To further protect your vinyl floors and prevent future stains, consider the following strategies:
- Promptly clean spills using appropriate methods, such as a baking soda paste for stubborn stains
- Treat food-related stains quickly with a mixture of white vinegar and water
- Use rubbing alcohol carefully for ink stains, applying with a soft-bristle brush
- Implement a regular cleaning schedule to maintain the floor’s appearance
- Educate household members on proper care techniques for vinyl flooring
Rinsing and Final Touches
After thoroughly cleaning the vinyl floor, a clean water rinse is essential to remove any remaining soap residue. This final rinse not only guarantees a spotless finish but also improves the surface shine by eliminating any dull film left by cleaning solutions. For best results, use lukewarm water and a well-wrung mop, working in small sections to prevent water from pooling on the floor.
Clean Water Rinse
The final step in deep cleaning vinyl floors is the essential clean water rinse. This vital process removes any remaining soap residue that can cause dullness or haziness on the vinyl surface. To achieve a spotless finish, use a separate bucket filled with clean water specifically for rinsing. Frequently rinse the mop or microfiber cloth to prevent redepositing dirt and cleaning solution onto the floor.
Pay extra attention to high-traffic areas during the rinsing process, as these zones tend to accumulate more dirt and require thorough cleaning. After rinsing, dry the floor with a clean towel or microfiber cloth to prevent water spots and reduce the risk of warping.
A proper clean water rinse offers several benefits:
- Improves the shine and clarity of vinyl floors
- Removes potentially harmful cleaning solution residue
- Prolongs the life of the flooring by preventing buildup
- Guarantees a truly spotless finish
- Helps maintain the floor’s original appearance and texture
Enhancing Surface Shine
Building upon the clean water rinse, improving the surface shine of vinyl floors involves a few additional steps to achieve a truly spotless and gleaming finish. After rinsing, thoroughly dry the floor using a clean towel or microfiber cloth to prevent moisture from seeping into the vinyl seams, which can cause damage. Buffing the dry floor with a microfiber cloth removes any remaining streaks or haze, improving the overall shine.
For those seeking an extra lustrous appearance, consider applying a specialized vinyl floor polish. Verify the surface is completely clean and dry before application to achieve ideal results.
| Step | Action | Purpose | Tools |
|---|---|---|---|
| 1 | Dry floor | Prevent damage | Clean towel/microfiber cloth |
| 2 | Buff surface | Remove streaks | Dry microfiber cloth |
| 3 | Apply polish | Improve shine | Vinyl floor polish |
| 4 | Schedule maintenance | Maintain appearance | Deep clean vinyl routine |
To maintain the floor’s pristine condition, implement a regular deep cleaning schedule every few months. This proactive approach prevents the accumulation of dirt and grime that can dull the surface over time, verifying your vinyl floors remain spotless and radiant between thorough cleanings.
Frequently Asked Questions
How Do You Clean a Really Dirty Vinyl Floor?
To clean a really dirty vinyl floor, begin by thoroughly sweeping or vacuuming to remove loose debris. Create a potent cleaning solution using warm water, white vinegar, and a few drops of dish soap. Apply this mixture to small sections, scrubbing stubborn stains with a soft brush or non-abrasive pad. Rinse frequently with clean water to avoid residue buildup. For persistent grime, use a baking soda paste, gently rubbing it into affected areas before rinsing. Finally, dry the floor with a clean towel to prevent moisture damage.
How Do Professionals Clean Vinyl Floors?
Professional vinyl floor cleaning typically begins with thorough vacuuming or sweeping to remove loose debris. Specialists often utilize commercial-grade cleaners specifically formulated for vinyl surfaces. They may employ advanced techniques such as steam cleaning or hot water extraction, carefully controlling moisture levels to prevent damage. For stubborn stains, targeted treatments like baking soda paste or gentle scraping with putty knives may be applied. Professionals also establish regular maintenance schedules, including deep cleaning every few months, to preserve the flooring’s appearance and longevity.
How to Make Vinyl Floors Look New Again?
While vinyl floors can lose their luster over time, professional-grade restoration is within reach. Begin with a thorough vacuuming using a hard floor-specific vacuum to prevent scratches. Create a deep-cleaning solution of hot water, white vinegar, and dish soap to cut through grime. For stubborn stains, apply a baking soda paste. Regularly maintain with a microfiber mop, and consider applying a protective finish like Shield and Shine to improve durability and preserve that fresh, new appearance.
What Should You Not Use on Vinyl Plank Flooring?
When maintaining vinyl plank flooring, avoid using steam mops, as excessive moisture can cause warping and adhesive issues. Refrain from abrasive cleaners or steel wool, which can scratch the surface. Ammonia-based products should be avoided due to their harsh nature, potentially causing discoloration and deterioration. Wax treatments are not recommended, as they can leave residue and create slippery surfaces. Finally, steer clear of cleaning solutions containing synthetic chemicals, as these may damage the floor’s finish and reduce its longevity.